
Occasionally, when working over a corporate local network or VPN you may need to access a machine that is blocked or otherwise inaccessible while on the present network. In cases like these where you have the remote server credentials but do not have direct access to the system due to network restrictions Port Forwarding/Tunneling can come to your rescue.
Challenges such as these have arisen because network administrators (if they are any good) restrict access to specific ports and network ranges for security reasons. Essentially, the idea is to limit services open on the network to only those basic ports or protocols needed to perform the standard business operations. To their credit this is good practice but it can become a bane in your existence the day you decide to do something out of the norm especially if it is a requirement to access certain non standard or otherwise blocked ports on a remote server to do a specific action. However, a common workaround is to use a dedicated server otherwise known as a jumpserver which has connectivity to gain access to the desired remote system.
Below we will take a look at 2 methods to accomplish this kind of redirection.
Tunneling via Putty
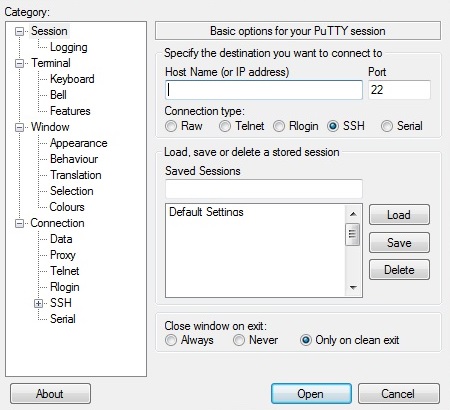
Putty is an SSH and Telnet client that can be downloaded for Windows. Once installed, upon opening the application the default tab, the Session tab, is presented to enter the server details to establish a connection.
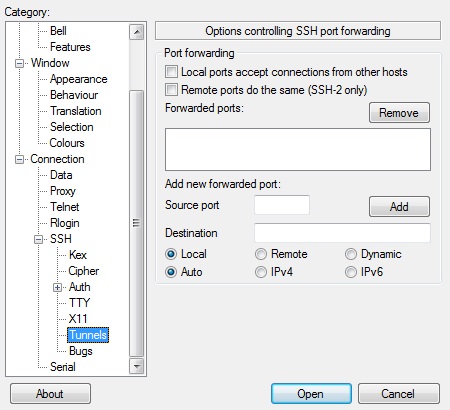
After entering the details, navigate to the SSH -> Tunnels tab, there one can configure local ports to pass through to the jump server which will be redirected to the desired destination server and port.
To store the connections details for future use revert to the original tab and enter a session name and select the Save button under the stored session section.
The above configuration allows access to the blocked service port on the local network using SSH. The SSH daemon on the jumpserver will then open up the desired port unrestricted to the remote location and redirect responses to our SSH client on the local network. For instance, this configuration could be used to allow a Database or Application server connection directly through the jump server, where we have direct access and redirect this connection to be accessible through a local port on the local host.
Obviously, the only prerequisite for this setup to work is that an SSH server that allows Port Forwarding be running on the jumpserver and the the local network allows an SSH connection to the jumpserver.
Tunneling via WinSCP
WinSCP is another graphical SSH client similar to Putty but it particularly excels at providing access to the remote file system whereas Putty provides only the Command Line Interface (CLI) access.
When creating a connection by starting a new session (or from a stored session) you must enter the server credentials for accessing the remote server just like in Putty.
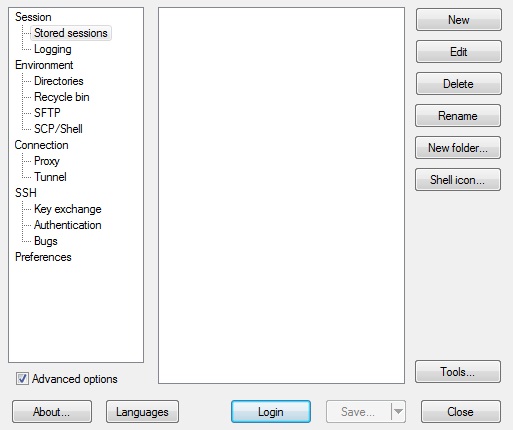
To perform tunneling tick the Advanced options checkbox before selecting the saved session or click the New button. In the advanced screen go to the Connection -> Tunnel tab. Here you must enable the Connect through SSH tunnel option and then enter the details of the Jump Server and then select Login.
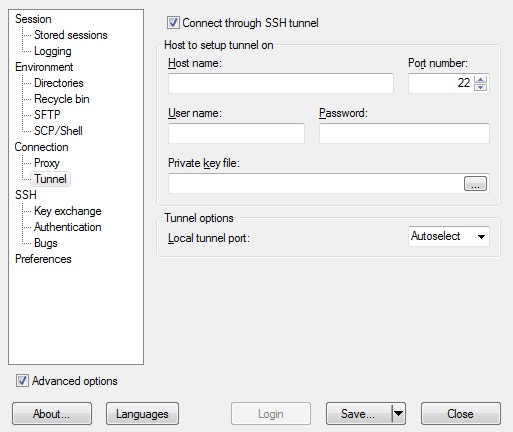
Now you can attempt to establish the session through the jump server where the remote server awaits at the end of the tunnel. While in WinSCP and connected to the remote server one can also launch a putty window (Once you have an instance deployed in the path specified) and perform command line operations as needed.
There are various ways to connect to a remote server, it all depends on what action is needed. Choose the best option in each scenario, Putty for CLI operations and WinSCP for File operations.
Written by Jaemar Miller.