In many of our tutorials in the past we have used VirtualBox (VBox) as a basis for creating a repeatable lab environment. However, we have never really explained how to install and get VBox setup for the uninitiated. Today we intend to do just that by creating a quick and simple guide for those new to using virtualization on the desktop. Note, similar tasks can be accomplished using VMware Workstation or Parallels but VBox is free and is our favourite tool of choice.
For this demonstration we will configure Oracle VM Virtual Box 5.0 for a subsequent installation of the CentOS 7 64-bit Operating System (OS). This will enable us and you to run this particular flavour of Linux on the host OS which in our case is Apple OS X. Not to worry you could similarly configure Oracle VM Virtual Box on many other host OSes such as Microsoft Windows, Solaris and other flavours of Linux. So in the event you are not using a Mac you will still be able to follow along.
At the end of this article you will be able to:
- Download a boot media such as CentOS 7
- Obtain and install Oracle VM Virtual Box
- Configure a New Virtual Machine (VM)
- Define the Hard Disk Configuration
- Assign Memory to the VM
- Attach Boot Media
- Setup Networking on the VM
Downloading Software
Let's get the basic software downloaded onto our desktop before we get started. First, we will download the image for our new OS that will run virtualized and then we will download the VBox application which is the software required to perform the virtualization.
The ISO for the CentOS installation media can be obtained at this link.
Oracle VM VirtualBox can run on a variety of Operating Systems and acts as the Hypervisor upon which we will install CentOS Linux for this tutorial. It can be obtained from this download link, you will need to choose the appropriate download link that applies to the system on which you will be installing the VirtualBox software whether it be Windows, MAC OS X, etc.
Installing Oracle VM VirtualBox
Run the downloaded installer to install Oracle VM VirtualBox and start the software.
Configure New Virtual Machine
Once VBox is started a new blank window will pop up. Click New then enter the fields as shown the diagram below.
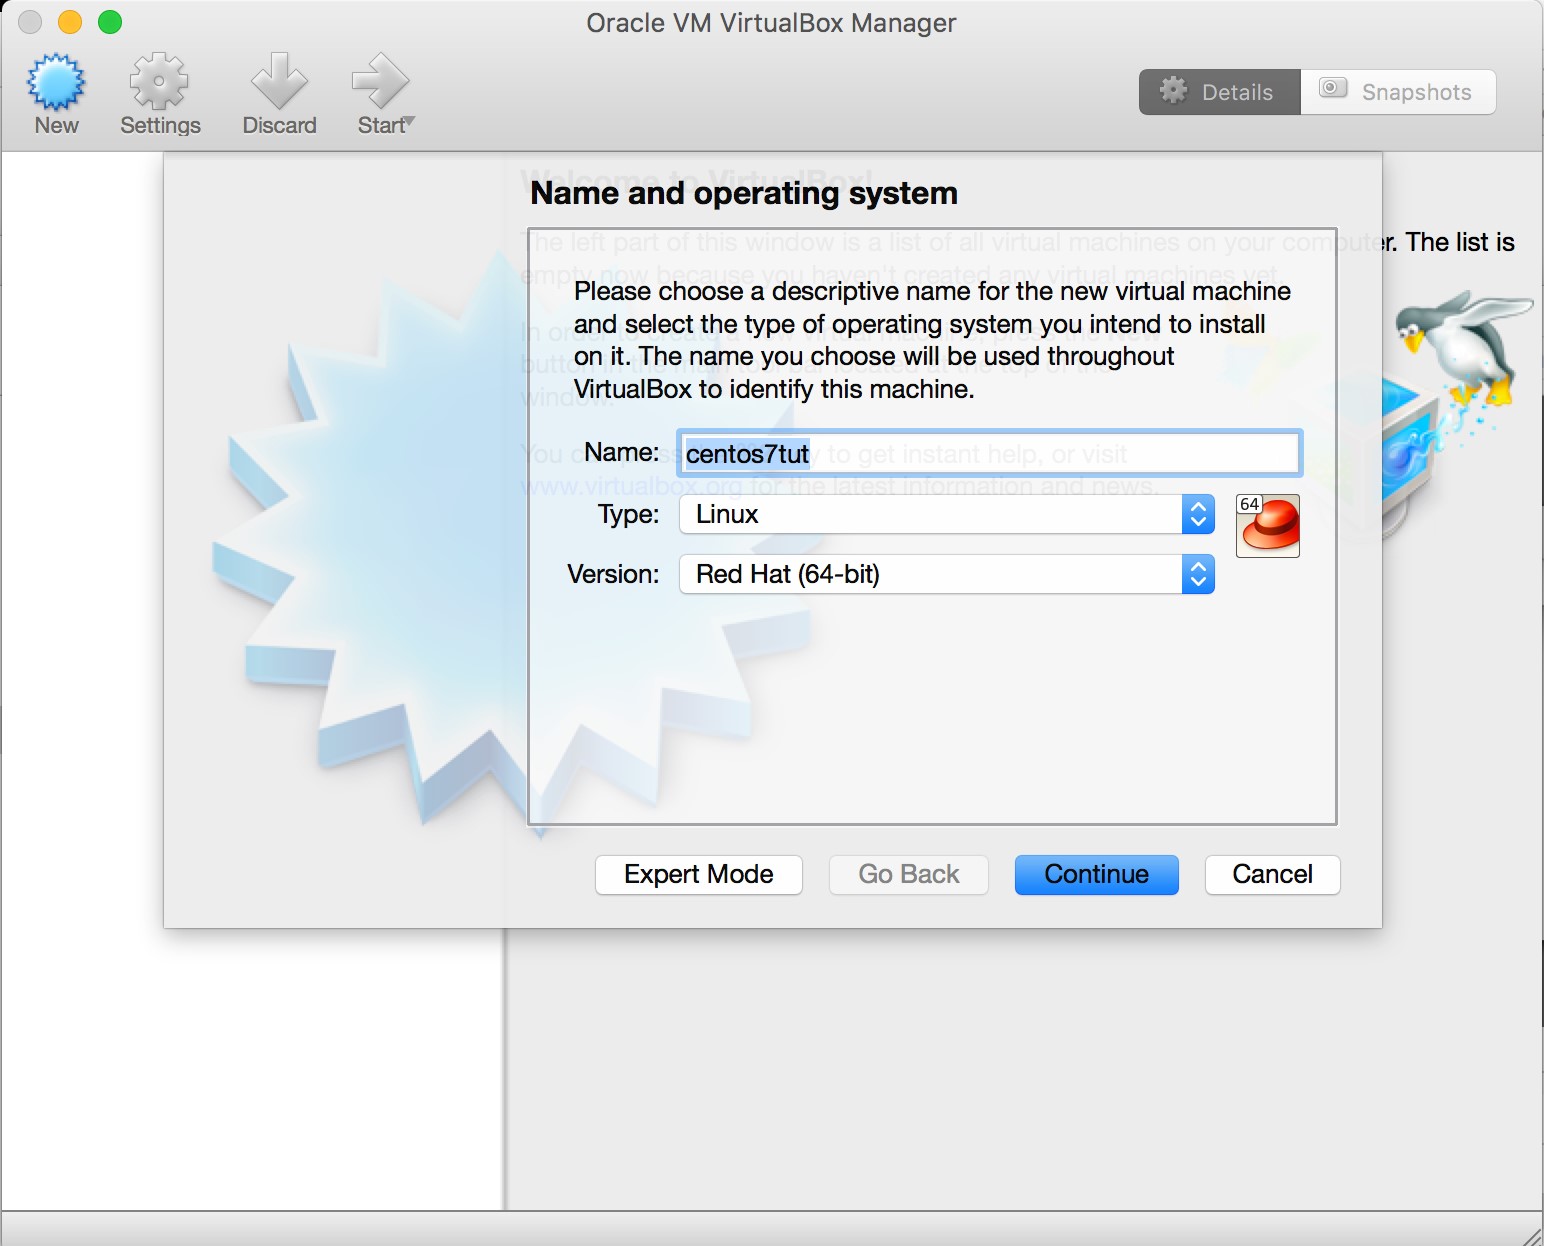
Provide an appropriate Name for your Virtual Machine and select the type of Operating System that this machine will run. As we are using Linux in this tutorial we will set Type to Linux and choose Red Hat (64-bit) as we are using the 64-bit version of CentOS, which belongs to the Red Hat Linux Family.
Review the values entered and Click Continue.
Memory Requirements
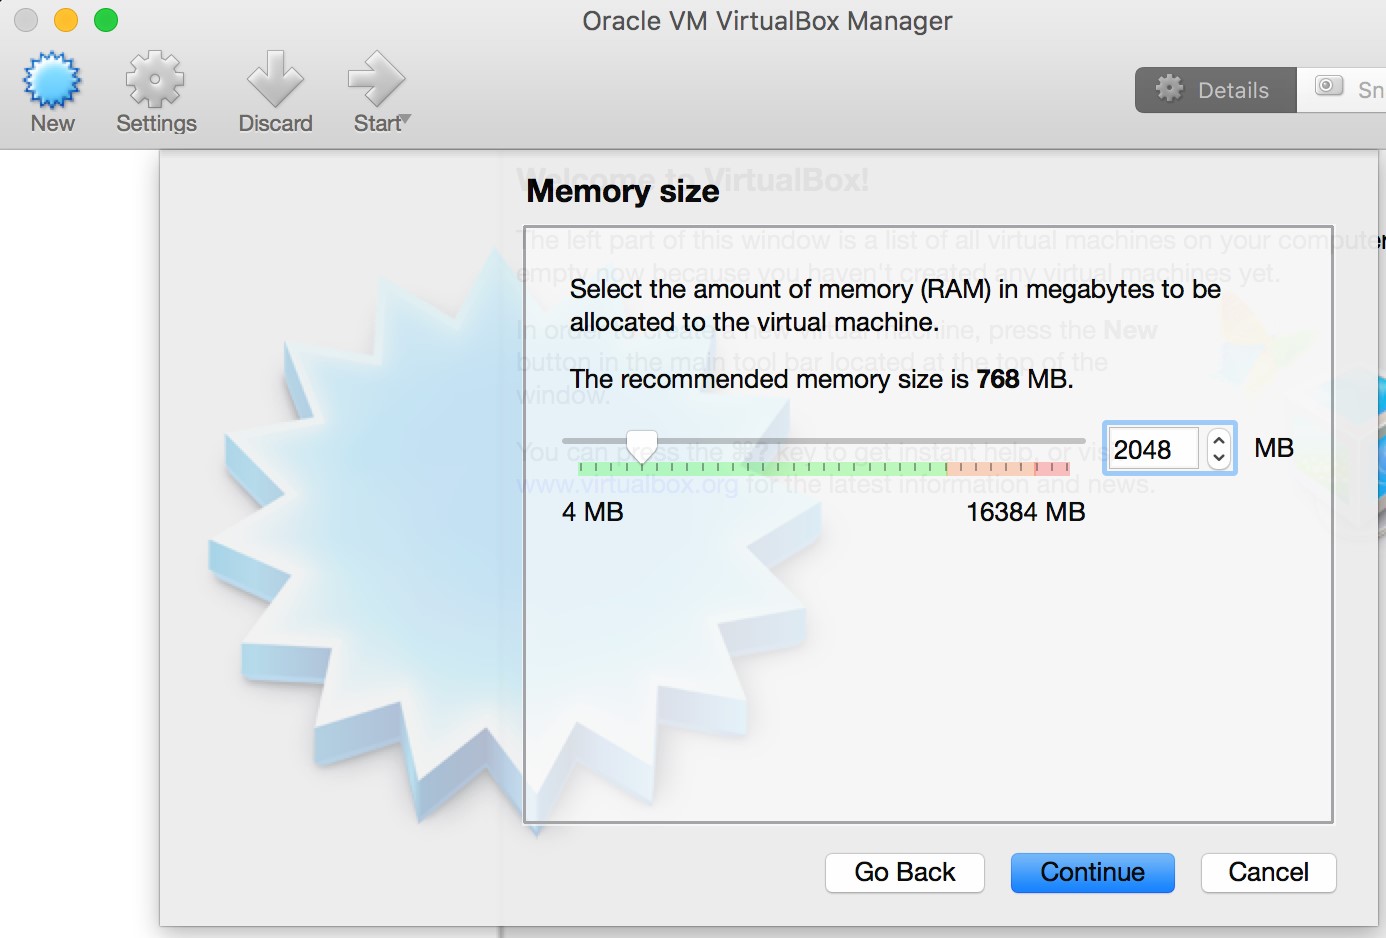
The amount of memory that should be assigned to a VM will varying depending on the underlying specifications of the Desktop/Laptop hosting the VM as well as the minimum recommended setting for the OS version being run. Note, that assigning too much memory here can negatively affect the performance of the host machine.
In this demonstration we will be guided by the recommended memory requirements as described in the CentOS 7 Release Notes. At a bare minimum 1024MB of memory is required for installation.
Nevertheless, we recommend using at minimum 2048 MB so as to not have a significant negative performance impact on the VM especially if you will be installing a GUI.
Enter your memory requirements and choose continue.
Hard Disk Requirements
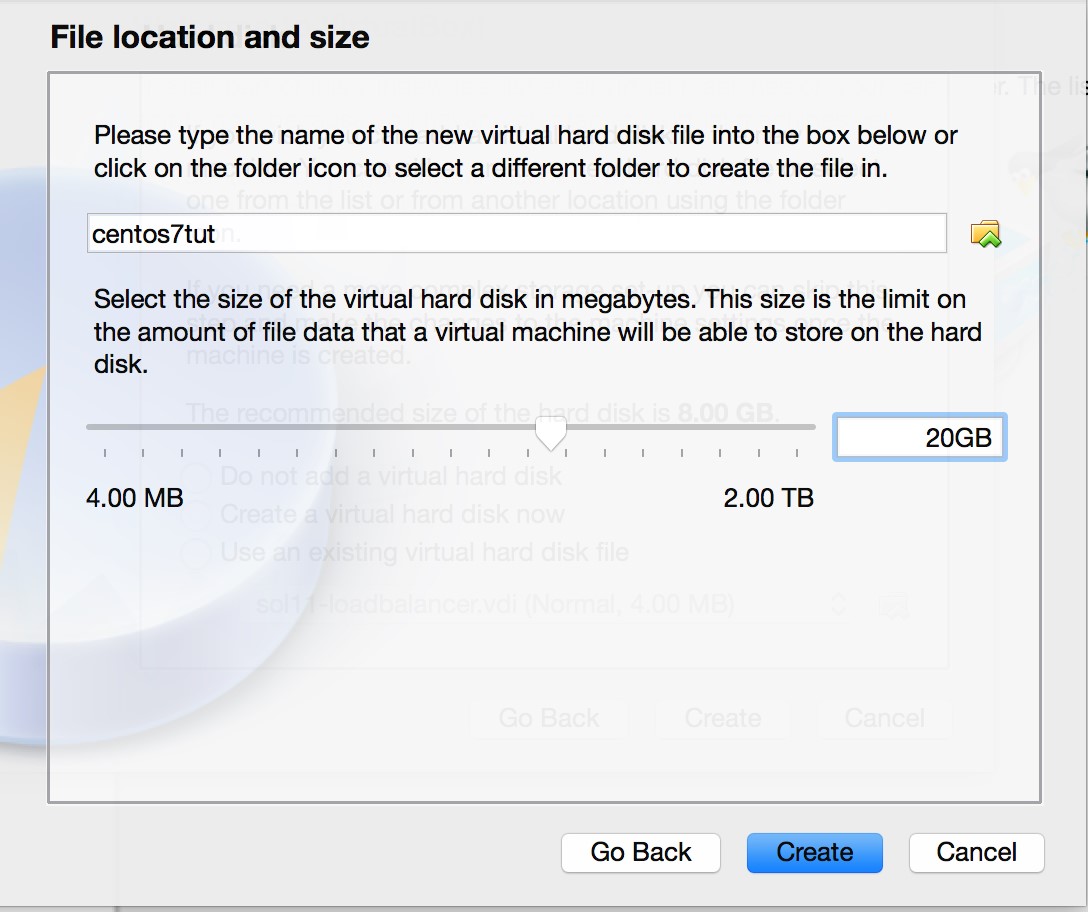
Select Create a virtual hard disk now and click Create. You will then be asked to choose the size of the hard disk. The choice for hard disk size will vary depending upon both the packages chosen for initial installation as well as the requirements for any software/data that will be loaded subsequent to installation.
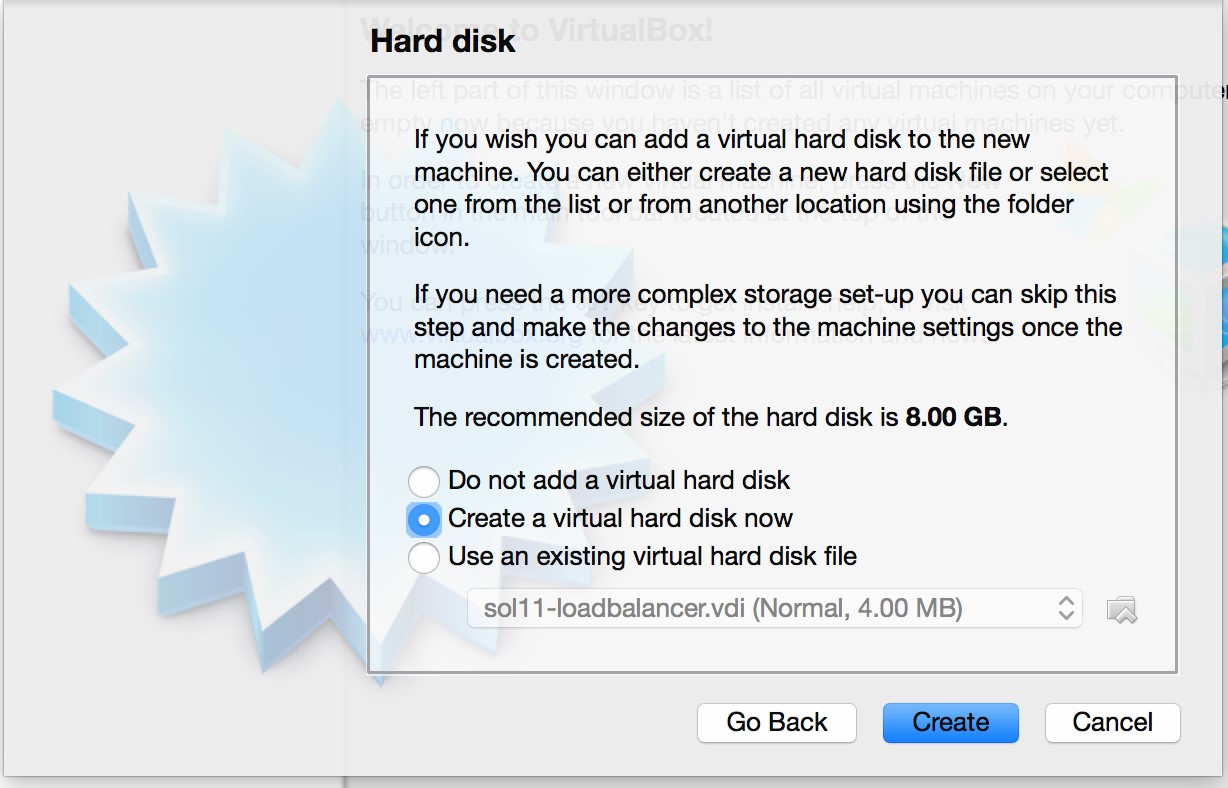
In the next screen you are presented with a choice for Hard Disk File Format. Either Hard disk file type works. We will leave it at the Default setting of VDI for this installation. Click Continue until you are asked to define the exact size of the Hard Drive.

The size of the hard drive you select will depend upon how you plan to use the virtual system. Consider reserving at minimum 20GB for the system installation, logs and any additional packages and then allocate more depending on the needs of your application. Click Create to continue. This will create a virtual machine that can be powered on.
Attaching Boot Media
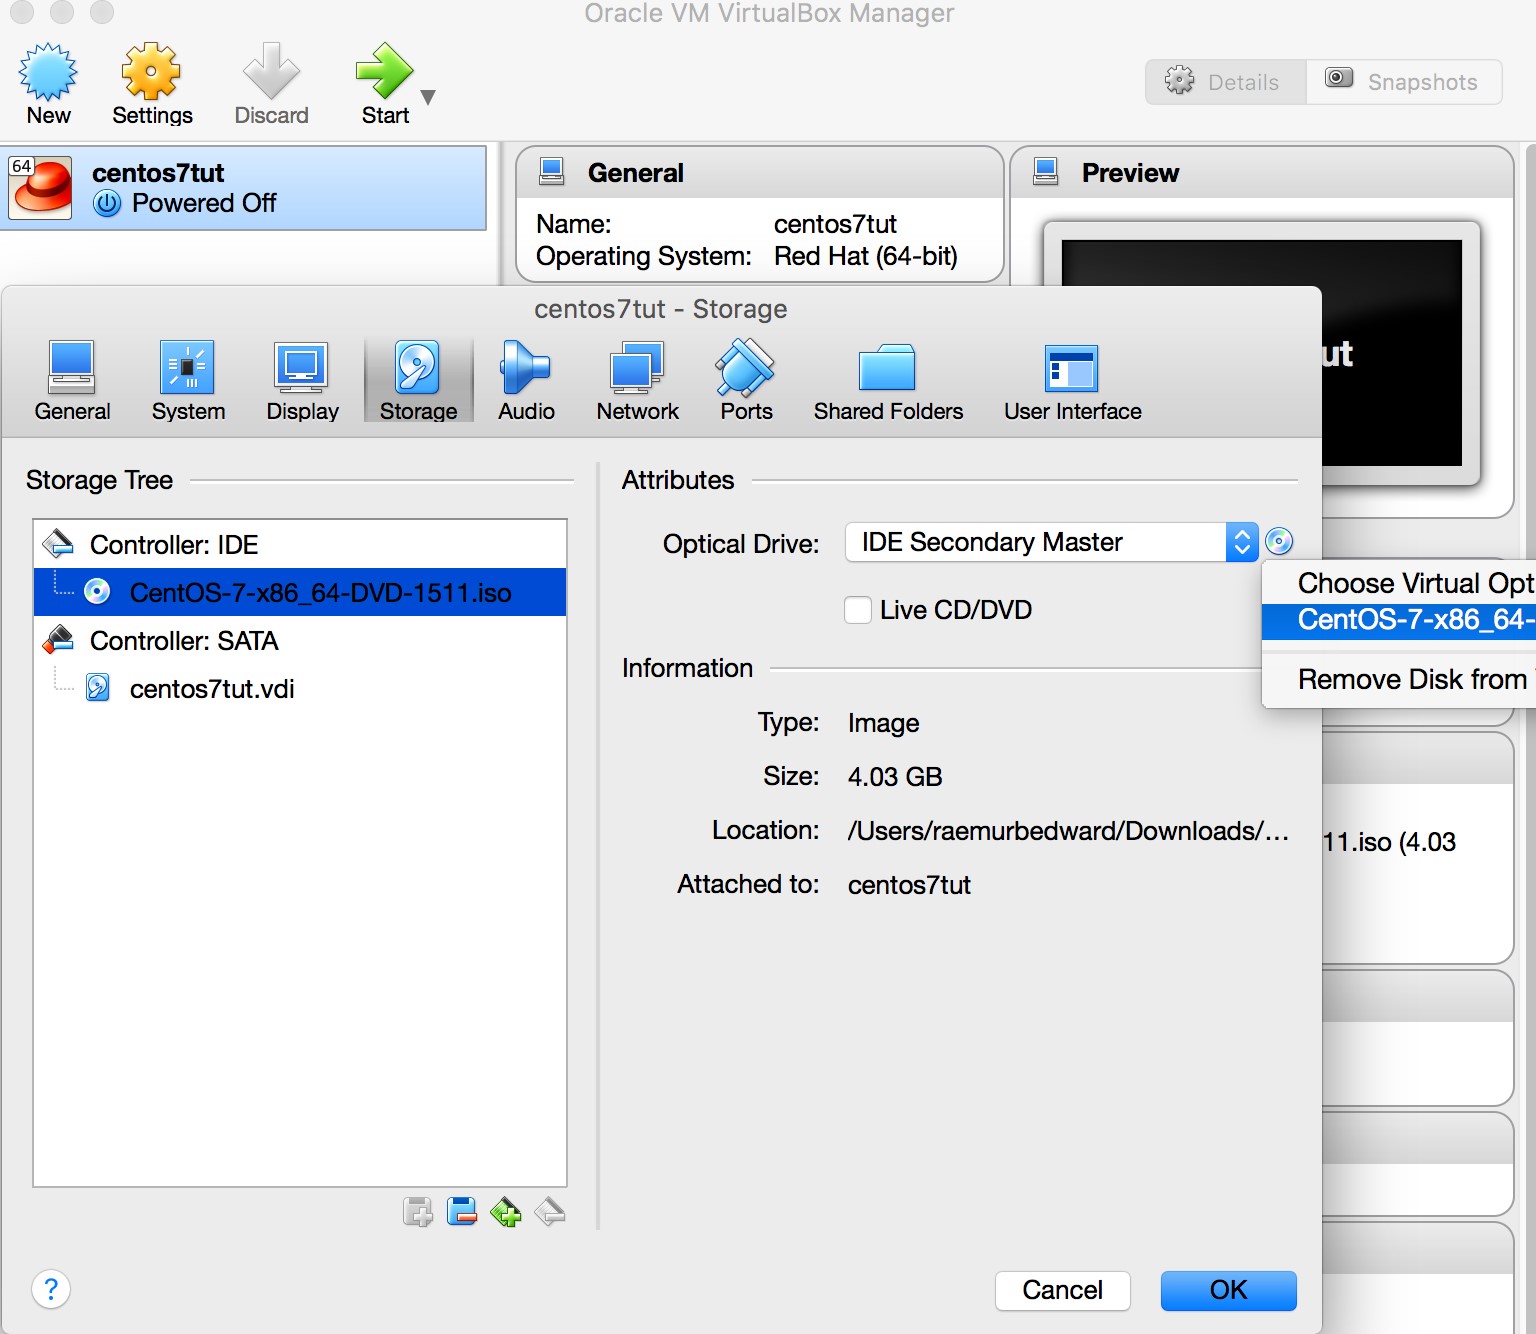
At this point the VM from above is created and listed in the inventory of available VMs. However, nothing has been installed on the virtual environment. Therefore, it is of little use until an OS is laid out onto the hard disks associated with it.
To make the machine useful we will need to add the ISO for the Operating system we have downloaded for installation. Click Settings, go to the Storage Tab and select the interface on the IDE controller then click the CD in the right panel in order to browse for the ISO.
Network Considerations
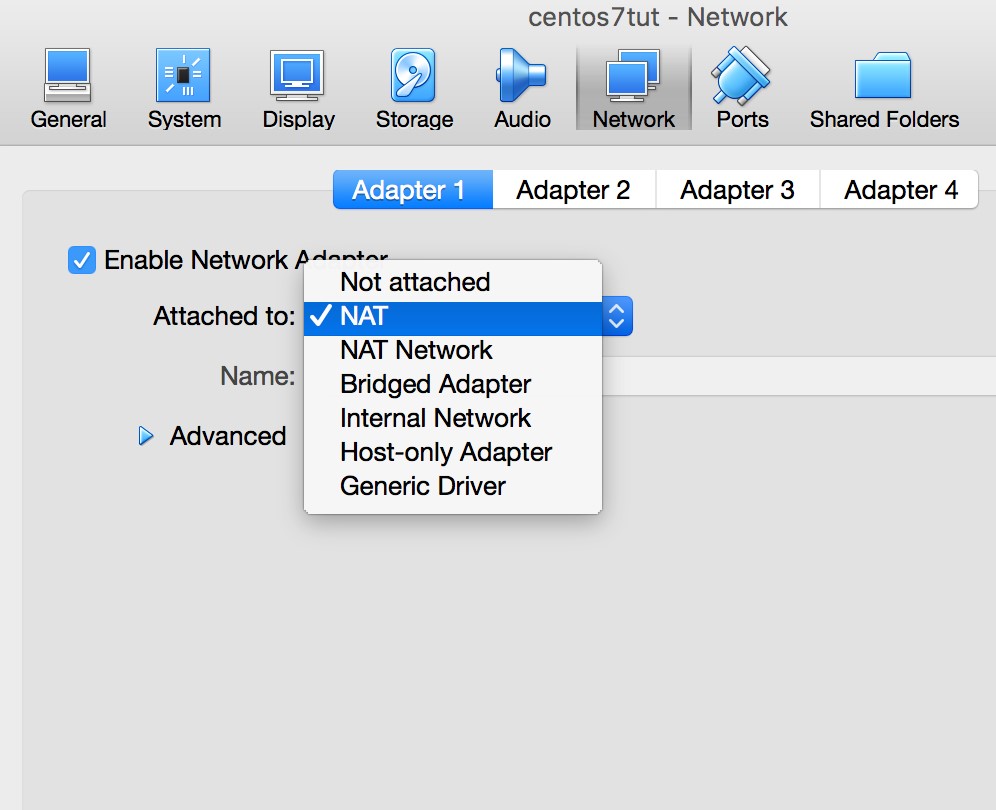
One final thing to consider before powering on our VM is networking. Almost all systems today require some sort of network connection to download or connect to remote services. A virtual machine is no different. The default network settings for the adapters should work fine for most users but if you’d like to change here are some of the options.
NAT (Network Address Translation)
Gives us access from the VM to the outside world using DHCP. A NAT creates a private network visible only between the host and the VM. All outside connectivity originating from the VM is masked by the host computer's network address.
Bridged Adapter
Gives the VM it’s own unique address on the physical LAN and as such along with providing the ability for the VM to access the outside world, on the flip side we also provide direct access to the VM from the outside.
Internal Network
Creates an internal network visible only inside VBox. Multiple VMs on VBox can privately communicate amongst themselves in total insulation from the host machine.
Now that everything is configured you can now power up the VM and load your Operating System. In a subsequent demonstration we will walkthrough the installation of CentOS 7.
Written by Raemur Bedward.